What steam engines, robots and analytics have in common

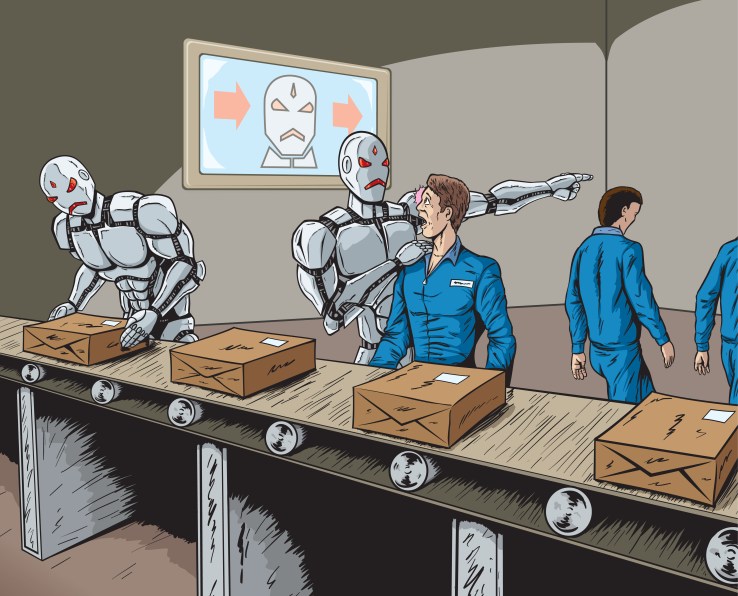
Are robots going to put us all out of work? That seems to be the question on every click-bait economic article’s mind.

The short answer: They aren’t.

The long answer: They will change the kinds of jobs we do, just like stone tools, the printing press, the first factories and computers changed how we work. Thinking about how those changes are going to happen and what organizations can do to embrace the changes is critical to success.

Societies and individuals have been adapting to new tools for as long as we’ve been using them. We’ve adapted to the water wheel and the steam engine, the automobile and the assembly line and the telegraph and the television — and we’ll adapt to the robot, as well. Initially, the tools are confined to experts, artisans and specialists. But the commercially viable and socially useful tools never stay there for long. The economic incentive is always on the side of getting these productive tools into as many hands as possible.

A classic example is the computer software industry. The early programming languages were difficult to learn, but subsequent versions became easier and now we’ve progressed into packaged, user-friendly business applications and solutions. The advanced business user need know nothing about the software code.

Robots, however, are not the only new tools on the horizon. There is another field that, for the same reason (being a useful, productive tool) will be developing and growing even faster than robotics — analytics.

Why analytics?  Because we are progressively coming to represent all of our human processes as data; we are digitizing our economy and our society, and analytics is the tool we will employ to understand that data and, by extension, the tool to best put that data to productive use.

Analytics as a tool for understanding our data and our world will not be as much about programming and coding as it will be about understanding our world.


In fact, analytics is the tool that is needed to figure out when and where to use the robot, whether it is cost-effective to use the robot and what the robot is telling us about the process it is doing. And just as with robots, where the key to productivity lies not so much with the designers but with the users, so too with analytics. Analytics as a tool for understanding our data and our world will not be as much about programming and coding as it will be about understanding our world.

Here are four examples of how analytics are game-changing in much the same way as robots.

Visualization

Early analytics required a stat degree to sort through. Visualization gives the business user the opportunity to not just look at results, but do their own analysis. A medication management company’s nursing staff helps reduce medical costs by $4,000 per patient through a visual dashboard that allows them to monitor overall medication and utilization trends among the chronically ill on their service. They can drill down to the individual level and immediately contact physicians when issues arise.

This information was available in the past — but staff needed to make requests to IT for reports that were likely out of date by the time they arrived. Now they’ve got analytical capabilities at their fingertips.

Collaboration

It’s not purely analytics, but it requires an analytical bent to corral data to use collaboratively. Take the example of financial models built by bankers to manage risk. These models can be complex, or hand-built Excel spreadsheets. As model mania has proliferated, it has become harder to track and catalog models being used in different departments.

Managers don’t need to be modeling experts to use the management system.


An analytics library concept called Model Management has evolved to allow banks to safely, quickly and efficiently catalog and analyze the models under use — retiring potentially dangerous ones and helping departments select from models already successfully deployed. One global financial company has 500 staff members accessing its interactive library that has cataloged 10,000 documents and 12,000 linkages related to the development, validation, deployment and monitoring of models. Managers don’t need to be modeling experts to use the management system.

Optimization

Companies will tell you they sometimes don’t know what to do with the data they can collect, especially retailers with all that SKU data. And shoppers will tell you there is nothing more frustrating than finding the perfect shoe (or dress or pair of pants) — in the wrong size. The data is there to stock the store correctly, but the process can’t be managed manually.

A multichannel shoe retailer reduced lost sales from stock-outs, increased customer satisfaction and reduced the percent of stock marked down by optimizing the customization of packs of shoes sent to each of its hundreds of stores. It uses analytics to view past purchase data and forecast the best mix of shoes. Buyers and planners — not statisticians — use the system.

Decision Making

We’ve got sensors embedded in lots of devices. The sensor itself doesn’t do much for us. It’s analyzing the data coming off the sensors that provide routine to breathtaking breakthroughs. In the routine category:  A major government organization uses sensors that help tell when a vehicle needs repair or maintenance.

Instead of following a schedule that might be built for optimal conditions, the sensor data of thousands of vehicles is continually analyzed to alert maintenance staff that it is time for preventive maintenance or repair. The analysis of the sensor data is ongoing — equipment, parts and conditions are not static.

Beyond my employer, SAS, there are many, many startups that have joined the game with new analytics tools. Among them: Geneva Healthcare for visualizing cardiac device data; Cognizant’s collaborative model management application; and Infobright’s Internet of Things decision platform.

Robots might help us count medication, add coins, stock the shoe store and repair the truck — but they need our human brains to figure out who needs the medication, which loan to offer, which shoe to stock and when to repair the truck. For that, analytics augments our abilities in ways that grow every day.

Featured Image: Danomyte/Shutterstock

Adblock Plus Finally Lands On iOS And In Google Play — As A Browser App

Popular desktop ad-blocking software Adblock Plus, which has some 50 million+ monthly active users worldwide, has finally launched an iOS app. It’s also managed to convince Google to allow its ad-blocking browser for Android back in the Play Store, noting that this is the first time since March 2013 it’s been allowed in the Google-controlled Android app store.

Speaking to TechCrunch back in July, ABP’s head of ops, Ben Williams, said the company was planning to launch an Adblock Plus browser for iOS in “early fall/late summer”. So they’re spot on in their timing.

Clearly the company was eager to get its app live before the widespread availability of iOS 9 — which introduces a content blocking feature to the platform that will enable developers to more easily create ad blockers and other content blockers for the platform, spawning more competition for Adblock Plus. (But arguably also raising mobile users’ awareness about ad-blockers as a general category — ABP dubs the move “a big step for this industry” in a statement today.)

While ABP has built a successful business on the desktop, the switch to mobile computing is more of a implementation challenge. In the case of its approach with these browser apps, it’s having to rely on users downloading and using a dedicated browser for ad-blocking — rather than being able to work as an extension on the native browsers (a route that’s blocked to it for now).

APB’s Android browser app has been in beta since May, and it says more than 300,000 people have downloaded it since then to kick the tyres. Having the app in the Play Store will of course enhance its visibility and discoverability.  (ABP has previously described its software as “practically invisible to the vast majority of mobile users” thanks to being ejected from Google’s app playground.)

It’s an interesting shift on Google’s part — but likely Mountain View’s hand is being forced here by Apple’s own move to clear a path for iOS users to more easily choose what types of content they do and don’t want to see by giving developers a web content blocking tool.

The wider point here is that mobile data can be costly, so sites larded with ads are not only annoying users by slowing down page loads times, but may also actively be costing them money by gobbling up their data allowance. Not to mention the other big issue here: hugely invasive tracking and ad-targeting technologies that are being increasingly deployed by advertisers.

“Adblock Plus is very excited and grateful to have our app, Adblock Browser for Android, available in the Google Play Store,” noted Till Faida, co-founder of Adblock Plus, in a statement, without elaborating on exactly how that feat was achieved.

ABP claims its Android and iOS browsers offer safer, more private, faster and more efficient browsing. It also touts reduced battery drain as an added benefit of blocking ads while browsing, along with claims of a reduced risk of malware infection.

But what about online publishers’ business models if everyone starts blocking ads? ABP notes that its browsers let users support websites by whitelisting them (and thus their ads). So publishers can appeal to their users to whitelist their ads, and/or improve the quality of their ads to make them less irritating.

Other controls offered to users of the ABP browsers include the ability to add additional filter lists, to customize the content that’s blocked, and change the default setting to block all ads — i.e. opting out of ABP’s own whitelisted ads (which it calls ‘acceptable ads’).

On iOS the company is also touting an “intuitive tab functionality” (vs Safari’s accordion style) and easier bookmarking, as well as claiming scrolling is smoother. Plus it’s tweaked the keyboard layout with an eye on browsing convenience, such as putting a .com button in pride of place.

A quick roadtest of the browser on iOS appears to confirm small speed enhancements when loading websites via the ABP browser vs standard Safari (and of course no annoying pop-ups), however the app also crashed during this test so it looks like there are a few teething stability issues for ABP to iron out.

Linear Algebra

.

Preface

A few words about this book.

Chapter 1: Introduction

How to navigate, notation, and a recap of some math that we think you already know.

Chapter 2: Vectors

The concept of a vector is introduced, and we learn how to add and subtract vectors, and more.

Chapter 3: The Dot Product

A powerful tool that takes two vectors and produces a scalar.

Chapter 4: The Vector Product

In three-dimensional spaces you can produce a vector from two other vectors using this tool.

Chapter 5: Gaussian Elimination

Coming soon!

Chapter 6: The Matrix

Coming soon!

Chapter 7: Determinants

Coming soon!

Chapter 8: Rank

Coming soon!

Chapter 9: Linear Mappings

Coming soon!

Chapter 10: Eigenvalues and Eigenvectors

Coming soon!

Chapter 11: Higher-Dimensional Vector Space Applications

Coming soon!

Chapter 12: Factorization

Coming soon!

Disney partners with Microsoft and Amazon

Despite its name, Disney Movies Anywhere, the studio’s cloud-based digital movie service, hasn’t really been available anywhere you want to watch its titles. But today, that’s beginning to change. The company is expanding support for the service to additional platforms with the launch of new apps for Microsoft Xbox 360, Amazon’s Fire TV and Fire TV Stick, and Amazon tablets. And, in a few more days, it will have apps for Android TV and Roku, too.

The service got its start in February 2014, as an iTunes-integrated application. Users would download the app, then sign in with their iTunes and Disney account information. The Disney Movies Anywhere app would then create a collection of movies you’ve already purchased via iTunes, and allow you to seek out new movies from its online catalog. Users could also redeem the “Digital Copy” codes found in Disney, Pixar and Marvel Blu-rays and DVDs in order to access digital copies of titles they previously only had access to on physical discs.

Since its debut, the service also rolled out to Google Play and Walmart’s VUDU. Plus, it works with Apple TV’s AirPlay and Chromecast, the studio notes.

Currently, there are over 450 digital movies in the Disney Movies Anywhere collection, including titles from Disney, Pixar, Marvel and now Star Wars, as well as exclusive short-form content.

Beginning today in the U.S., a new Disney Movies Anywhere app will be available to Amazon and Microsoft customers, thanks to new partnerships Disney has forged with both companies. The move coincides with one of Disney’s early digital release of one its bigger movies of the year, Marvel’s Avengers: Age of Ultron.

The Disney Movies Anywhere app is available now for Xbox 360, Amazon Fire tablets, Fire TV and Fire TV Stick. However, customers won’t necessarily have to use a separate app in order to access their Disney movie collection, the company explains.

You’ll also be able to watch their Disney movies directly through the Amazon Video apps for TVs, connected devices and mobile devices, as well as online at amazon.com/amazonvideo. For Microsoft customers, a similar integration is supported, as you’ll be able to watch Disney movies through Microsoft’s Movies & TV service on Windows and Xbox devices, and atmicrosoft.com/en-us/store/movies-and-tv.

In addition, on September 15th – the  same day as the live-action Cinderella becomes available in digital format – Disney will roll out new apps for both Roku and Android TV.

As Disney has done in with past launches, it’s encouraging customers to sign up for the service by giving away a free movie. For a limited time, those who connect an iTunes, Amazon Video, VUDU, Microsoft Movies & TV, or Google Play account for the first time will get a free copy of Disney-Pixar’s Monsters, Inc.

Disney, like many studios, has been affected by declining DVD sales as people increasingly turn to online services to access video content. By offering support for an expanded number of platforms, Disney has the chance to keep more of its customers in its own ecosystem going forward.

Raspberry pi touch display

. You’ve been incredibly patient: thank you. The official Raspberry Pi touch display is on sale today, priced at $60 (plus local taxes and shipping): you can buy it at the Swag Store, at RS Components/Allied Electronics and at Premier Farnell/Newark. Other sellers will be receiving stock later this week.

We gave one to Alex Eames of RasPi.TV a couple of weeks back so that he could give us one of his famously clear video introductions:

Two years ago, I began the process of looking for a simple, embeddable display for the Raspberry Pi. I honestly believed it would only take us six months from start to end, but there were a number of issues we met (and other products diverted our attention from the display – like Rev 2.1, B+, A+, and Pi 2). But we’ve finally got there, and I thought you might be interested in learning about our journey.

Display Technology

First of all, here’s an overview of the technology involved in the different types of display that the Raspberry Pi can support.

Currently the Raspberry Pi can support the following display interfaces:

HDMI

HDMI is the system we all know and love, it allows us to communicate with monitors up to 4K and has a relatively low signal swing to reduce EMI. There are lots of other very useful bits of the specification such as CEC (a communication channel between the TV and the Pi that allows us to receive input from the TV), EDID (a method of automatically identifying the different formats the TV supports) and a hotplug signal allow the Pi to know when you plug in the cable. The only problem with HDMI is that the electronics required to convert from HDMI to the native panel interface can be quite expensive.


DPI

DPI (Display Parallel Interface) is a 24-bit parallel interface with a clock and various synchronisation signals totalling 28 signals, all of which switch at a rate of around 70MHz. This interface has been phased out of tablets/phones because the electromagnetic noise created and power consumed by all those wires. Although it is possible to directly talk to a DPI display through the GPIO connector on a Raspberry Pi it would leave no GPIOs left for people to connect other HATs. DPI displays are available everywhere though, and are relatively cheap!


DSI

DSI (Display serial interface) is a high-speed serial interface based on a number of (1GBits) data lanes. The total voltage swing of the data lines is only 200mV; this makes the electromagnetic noise created and power consumed very low. Unfortunately, DSI displays are only really created and sold for special purposes (i.e. when a mobile phone manufacturer wants to make a new phone), and although they can be available to buy, manufacture of the devices is subject to the lifetime of the phone!


DBI

DBI (Display Bus Interface) is an old display technology that usually has inbuilt frame storage to reduce tearing, due to the memory and hardware it makes DBI screens expensive.


So our solution to this problem was to employ both DSI (to avoid using up all the GPIOs) and DPI (easily available screens in suitable resolutions) and a bridge chip/conversion board to convert between the two.

We got in touch with many display manufacturers to try and get a display that would tick the following requirements:

Quality colour reproductionPixel quality (sometimes you can see the individual pixel boundaries)Contrast ratioViewing angleAffordableLifetime (length of time before the display is no longer going to be manufactured)

Of course lifetime is one of the most important requirements, because if a display only has a lifetime of a few months (or the manufacturer is uninterested in guaranteeing a minimum lifetime), we would have to repeat the whole development cycle once more. So we can’t just buy a display that’s used in your standard iDevice, because it is likely to be cancelled when the iCompany decides to move to another manufacturer!

When looking for a device, we needed to look for what are termed ‘Industrial’ LCD displays. These tend to have better-quality metrics and guaranteed availability.

In the end we chose an industrial-quality display from our friends at Inelco Hunter based in the UK, who were able to create something very special:

RGB 800×480 display @60fps24-bit colourFT5406 10 point capacitive touchscreen70 degree viewing angleMetal-backed display with mounting holes for the Pi

Our first PCB to do the DSI to DPI conversion was completed back in mid-2013. The board used a Toshiba bridge chip to convert the DSI signals to DPI ones. I spent quite a bit of time getting the Raspberry Pi to talk to the bridge device, and then got it working and displaying an image (yay). We then took it to our local EMC test facility to investigate how easy it would be to pass CE and FCC electromagnetic compliance.

A little word on compliance…

When electrical currents flow around a circuit board, they create electro-magnetic fields, which can be picked up by other electronic devices. Maybe you remember what used to happen to your CRT television when your mum turned on the hoover (sorry for those of you without any experience of analogue television). This was becoming a problem for television and radio receivers; when I was a kid and plugged in my Spectrum 48K, the radio wouldn’t work properly any more. So the powers that be introduced new rules about the amount of energy a device can output at various frequencies from 25MHz up to a couple of GHz. You have to make sure your electronic devices do not cause interference, and are not susceptible to electronic interference.

The best way to reduce electromagnetic interference (EMI) is to keep your high-frequency signals short and close to a nice continuous ground plane, reduce the frequency and drive of the signals (reducing the high frequency components), and reduce the maximum swing of the signals to reduce the signal power. Looking at modern communication systems, that’s exactly what they do: for example, DSI has a signal swing of only 0.2V and only has two or four actual signal lanes.

Unfortunately, DPI is 1.8V signal swing, and although much slower, it needs 28 signal wires, meaning 28x more paths with the same edges switching up and down at the same time. This gives us an output looking something like:

The green line is the class A line, and the black is class B (we need to reach Class B). You need to be below the black line if you want to sell the device to be used in the home.

Back to the drawing board

The next step was to understand why the EMI is so bad, so we tried redesigning the board so it looks like a HAT (it’s not actually a HAT because there is no EEPROM for device tree information), and added an Atmel device to control the power/reset and PWM for the backlight. We also went through three different iterations of adding chokes to improve the noise conducting down the power supply cable, and manipulating the route of the DPI signals to improve the path of the ground return.

In the end we did reach our goal of a class B EMC pass which is a great achievement considering where we started!

Building the display from scratch

The first displays are supplied as a kit which requires some initial construction. Alex Eames from RasPi.TV has helpfully provided a video showing how to do it.

Connecting the display

The display module integrates the LCD display with a conversion board that should be plugged into the Raspberry Pi through the display connector. Be aware that the connector is the same as the camera connector, but the two are not compatible, so be careful to correctly identify the display connector first.

The 15-way FPC connector should already be plugged into the display conversion board with the silvered contacts face-up. You can then plug the connector into the Raspberry Pi with the silvered connectors inboard (facing towards the USB connectors).

Powering the display

There are three options for powering the display:

1) Separate power supply

Just add a separate uUSB power supply rated for at least 500mA, and plug into the display board where it says “PWR IN”.

2) USB link

Attach an official 2A Raspberry Pi power supply to the display board “PWR IN” connector, then attach a standard uUSB connector from the “PWR OUT” connector to the Raspberry Pi.

3) GPIO jumpers

Attach two of the supplied jumpers to connect 5V and GND from the Pi.

Using the display

To use the display the user just needs to do the following:

$ sudo apt-get update$ sudo apt-get upgrade$ sudo reboot

The Raspberry Pi will now automatically detect the display and use it as the default display (rather than HDMI), although HDMI will still be initialised. If you’d prefer for the HDMI display to stay as default then add:

display_default_lcd=0

to the config.txt file.

Dual display usage

It is possible to use both display outputs at the same time, but it does require software to choose the right display. Omxplayer is one application that has been modified to enable secondary display output.

To start displaying a video onto the LCD display (assuming it is the default display) just type:

# omxplayer video.mkv

To start a second video onto the HDMI then:

# omxplayer --display=5 video.mkv

Please note, you may need to increase the amount of memory allocated to the GPU to 128MB if the videos are 1080P, adjust thegpu_mem value in config.txt for this. The Raspberry Pi headline figures are 1080P30 decode, so if you are using two 1080P clips it may not play correctly depending on the complexity of the videos.

Display numbers are:

DISPMANX_ID_FORCE_LCD 4DISPMANX_ID_FORCE_TV  5DISPMANX_ID_FORCE_OTHER 6 /* non-default display */

Touchscreen

The Raspberry Pi display has an integrated 10-point touchscreen (a bit of an overkill, but it does seem to work well). The driver for this touchscreen outputs both standard mouse events and full multi-touch events, and therefore can work with X as a mouse (although not brilliantly – X was never designed to work with a touchscreen!).

Kivy

Kivy is a Python GUI development system for cross-platform applications. It is designed to work with touchscreen devices (phones and tablets), but also runs on the Raspberry Pi. To install Kivy onto your Pi follow the instructions at

http://kivy.org/docs/installation/installation-rpi.html

I’m fairly sure that these are the instructions that worked for me, although I make no claims that it’s an easy task!

This short, soundless video shows off the possibilities of Kivy with multipoint touch nicely.

Raspberry Pi’s Matt Richardson has been experimenting with using Kivy to allow the touchscreen to control Raspberry Pi’s GPIO, and vice versa:

From the videos you can see how capable the interface is. I’m in the process of developing a touchscreen application for an installation at home to control a safety and heating monitoring system, so you’ll probably hear more about that at some point!

Last of all, if you’d like a stand for your display, you could do a lot worse than to take a look at the 3D-printed one that Matt Timmons-Brown has designed; we like it a lot. You’ll find his model on Thingiverse.

Have fun, and make something awesome!

Gordon

కరోనా కోవిడ్ -19 గురించి ఏ వికీపీడియా మీకు చెప్పలేము?

కరోనా కోవిడ్ -19 గురించి ఏ వికీపీడియా మీకు చెప్పలేము? మిమ్మల్ని మీరు రక్షించుకోండి  Your మీ చేతులను తరచుగా కడగాలి Eyes మీ కళ్ళు, న...